Kitchen Design Ideas Budget Friendly
Kitchen design ideas for a budget friendly can be easy to achieve. It’s no secret that one of my favorite rooms of our house is our kitchen. I love the layout of our kitchen, and that’s it open to our family room. So how did I create my kitchen design on a budget? Let me show you 5 budget friendly kitchen design ideas to transform your kitchen.
If you’ve been following my blog you know that this kitchen design transformation did not happened over night. And it’s the one room I am continually tweaking. I have more changes coming to my kitchen very soon!
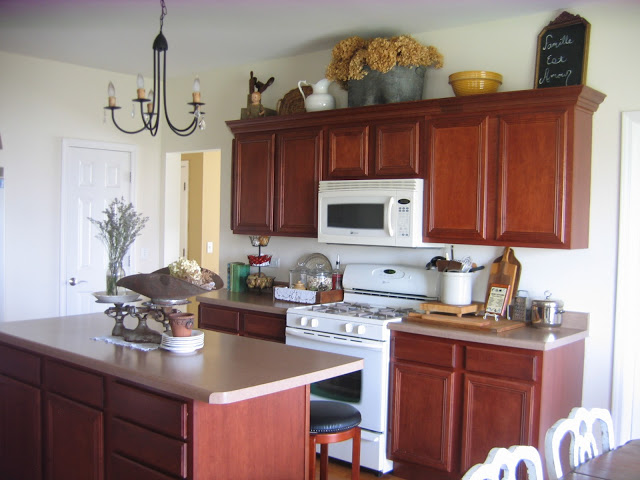
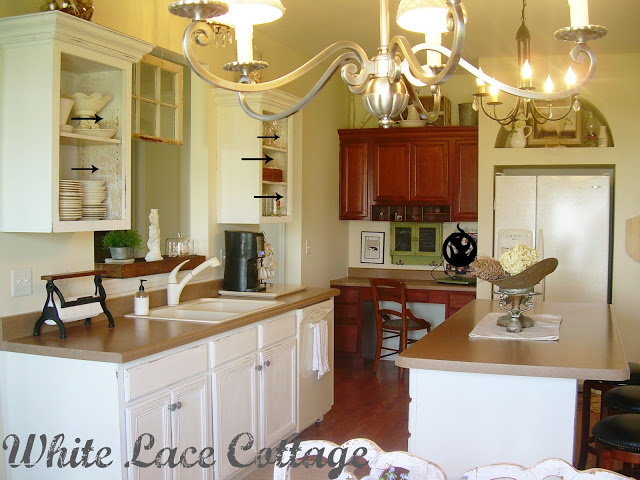
But let’s take a look back at the changes of my kitchen. I want to share what I did, how I did it and how you can create a Shabby farmhouse kitchen design on a budget. Money doesn’t grow on trees in my house, I have a wish list of things I would love to do and change in my home. But it’s not in our budget. And when I say budget, I mean a really tight budget. I have to do what I can with what I already have. When we moved into our home our kitchen looked like this.
These older photos are not the best quality, but it was in the early stages of blogging before I started editing my photos. Anyway, yes the cabinets are beautiful, but not the look I wanted for our kitchen design. My style is mostly Shabby Chic these days, but I like French farmhouse.
The first thing I changed in my kitchen design was my paint color. You can see it was a golden color, see my dining room in the background? That’s what was painted on my kitchen walls too. Actually my whole house, so I slowly started painting all the walls white.
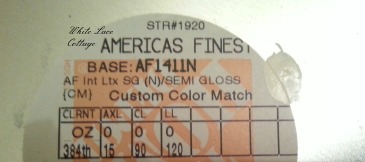
Here is my paint formula.
Sorry I don’t have a name, it was a custom color, but it’s a warm white. I chose a warm white because of my wood floors. After painting my walls, I next painted my cabinets, this was going to make a huge change from formal cabinets, to a casual look.
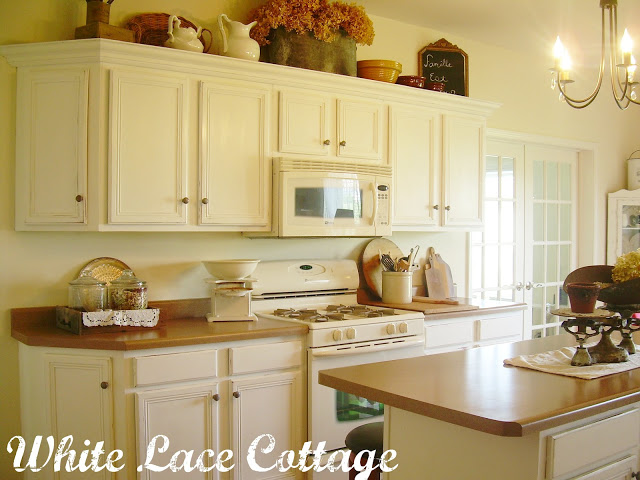
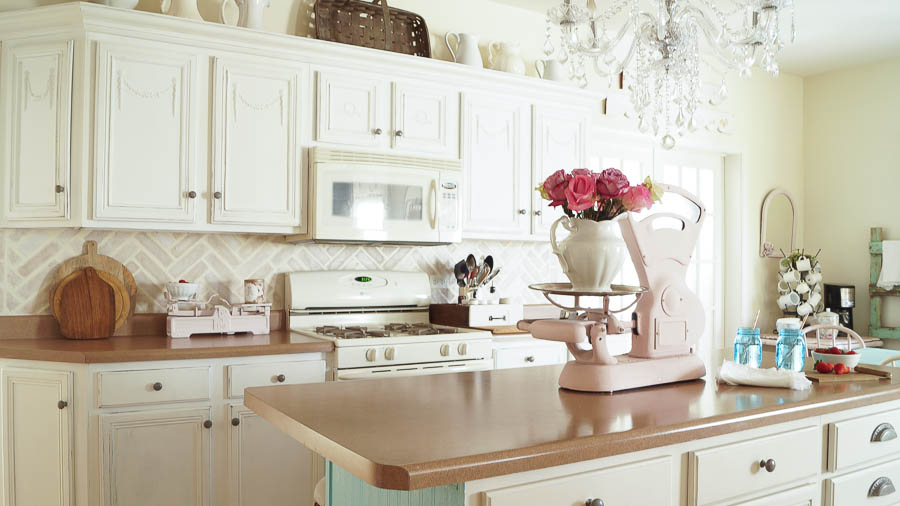
This was in the beginning stages, and it was finally looking nice and bright. These were painted with Anne Sloan chalk paint pure white. They have held up pretty good for three years, but they are starting to look dull and so I recently painted them using my signature paint color White Lace. At this point I also added hardware to my kitchen cabinets.
Crazy, I never had a house with hardware on my cabinets. Why? Because it’s so expensive, see I am really cheap frugal. You can see in this photo, I didn’t have all of my hardware on my kitchen cabinets yet. I’ll be sharing how I transformed my thrift store knobs into these that look like variegated copper.
To me there’s nothing like a farmhouse kitchen design and open cabinetry. So I decided to take two of my kitchen cabinet doors off. Now I could see my everyday dishes, that I think are pretty, and my glassware too.
Just taking these two cabinet doors off gave it such a different look. At this point I wasn’t sure what to do with my built in kitchen desk, and then someone said they were getting rid of a desk for free!
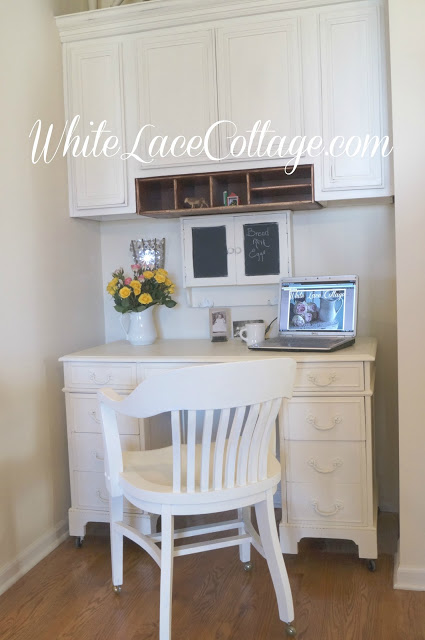
The chair was found at a yard sale for 15.00. I took this desk out, which was not hard at all, and added an old vintage desk. With paint left over from my cabinets, I painted the desk and chair. I love it because I have so much more room now. The cabinets above the desk were painted the same color as my cabinets.
You’re probably wondering what that piece is under my cabinets, that’s painted white and looks like a chalkboard. The builder installed our outlet, and they put it straight in the middle of the wall. I’m not sure why on earth they put an outlet in the middle of the wall.
We do use these outlets, but this would be very ugly with cords hanging. So, this piece not only hides those cords, but the outlet as well. And that’s not all, the phone cable is next to it, and that’s why I added that little mini chandelier sconce. It’s battery operated,and is just for show. It hides the ugly phone outlet Yeah, we really didn’t need the phone in this room. It’s in our office that’s right off of our kitchen.
You can see that the floor needed to be fixed, the builder never finished staining the floor. They just put the desk in without finishing it. Okay, I am going to keep it real here, many years later, I still have to fix this.
Yep, I have shared my kitchen many times since, and yes this is still not finished. I’ve been afraid to mess with it because I think we will need to have the kitchen floors, and our guest bathroom floors refinished, so I have been patiently waiting. Hoping it will happen in the next year or so.
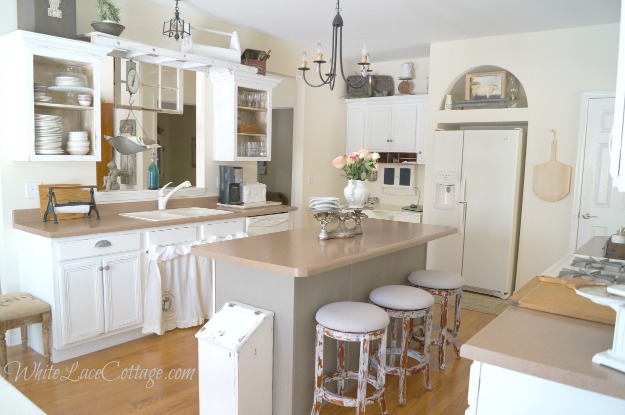
Anyway, see that cabinet above? I knew that I was not going to paint those cubbies, so I distressed the heck out of them to make it seem as though it was an old piece I added to my cabinet. I know, it’s a crooked photo, many of these old photos are that way because it was before I was editing my photos. Next I decided that I needed more of a farmhouse kitchen design look. I took two more doors cabinet doors off, this time by my sink. I found two ruffled hand towels at a yard sale for 5.00. I don’t have a sewing machine, so I hand stitched them.
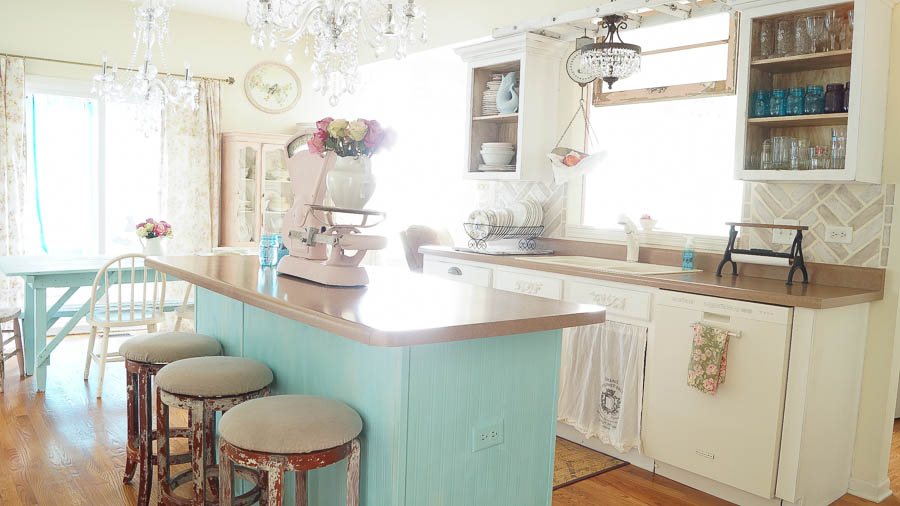
You can see at this point I added that ladder, (found at a yard sale) between my kitchen cabinets. The hanging scale was found at an antique store, and I just added that farmhouse look. The stools were recovered with painters tarp, you can purchase it at a home improvement center, I think it was 10.00?
This was easy to do, I removed the cushions,and stapled the fabric to the cushion. Next I painted the stool legs, using milk paint giving them a real authentic chippy look. The island surround was painted, this is one of the many colors that this island has been painted. And I may be repainting and changing it yet again.
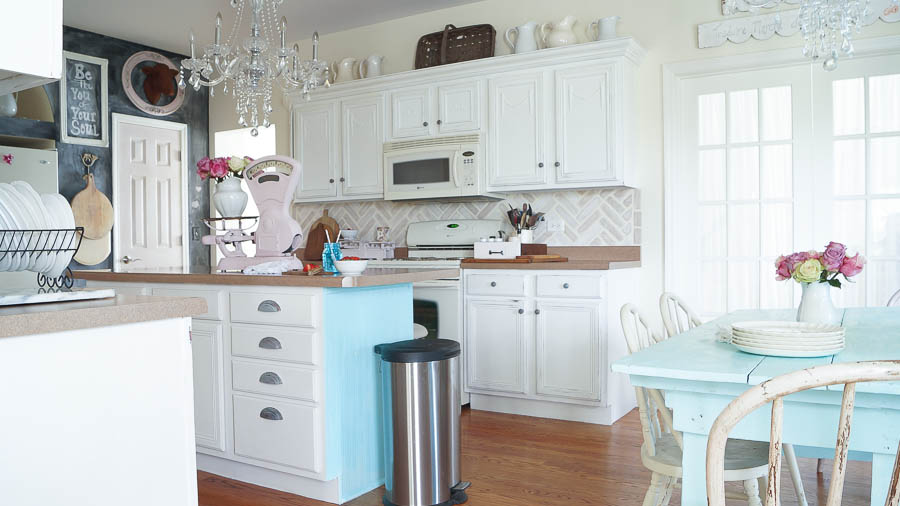
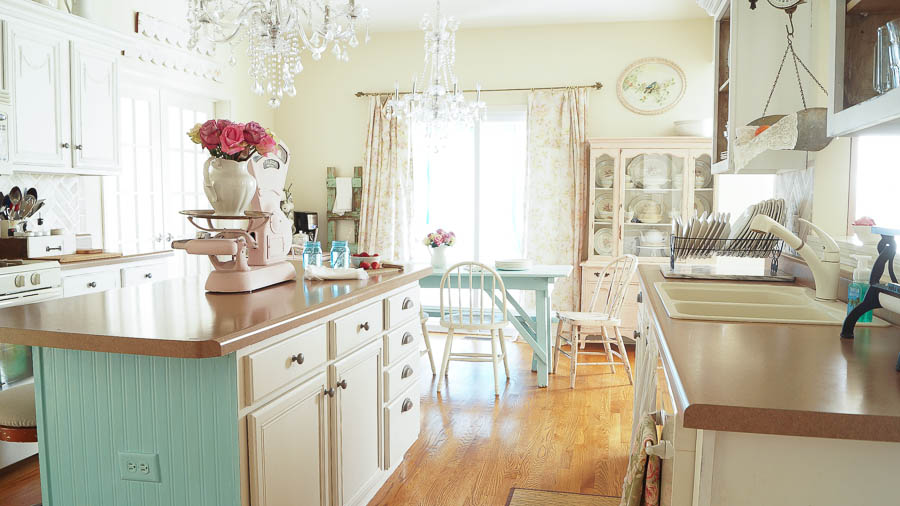
I couldn’t take those lights any longer, but I am cheap frugal, I kept waiting until I found the right chandeliers, for the right price. I wanted bling, and sparkle, but that can come with a price tag. The chandelier over my island, and the chandelier over table needed to be the same. I didn’t want three different chandeliers in my kitchen design. And I also needed a smaller chandelier over my sink, something that would work with the other two. I found all three at Menards.
You can see I also added that chalkboard wall. it’s a super easy, and cheap way to add an accent wall in a kitchen. I used Rust Oleum chalk board wall paint, it’s 10.00 for a small can. Plenty for this wall, I applied two coats. It brings a little depth into my kitchen design, and I love that it can be changed when I want to. I added a few frames just for fun and the heifer head too. I’m still not tired of this look in my kitchen so it’s staying.
Let’s get back to those chandeliers….. The chandelier over my island and table were 199.00 each, which is an incredible price! They’re crystal, but the catch, I had to put these together. And when I say put together, I mean I had to wire the arms on and the whole nine yards.
Yeah, at that point I was thinking, what did I get my self into? And yes, I also hung all of these by myself, not an easy job, but I did it and saved a ton of money too! I also replaced my kitchen table and a few other pieces in my kitchen, which is an ongoing thing. But really, nothing says a farmhouse kitchen, like a farmhouse table. I already had that farmhouse table, I was using it in another room of my house.
And very recently I added my faux brick stencil, you can read the tutorial HERE. My kitchen curtains were made from a vintage sheet and are no sew, you can read about those HERE.I forgot to mention my appliques that I added to my cabinets.
This was very easy to do, and I only added these to my upper cabinets. I didn’t want to over do it, with too many. I think that can look a little tacky in my opinion if you add too much. But just adding them to my upper cabinets brought a little detail that was lacking. You can read about that HERE.
So now that I shared all of the changes in my kitchen design, and how I created my Shabby Farmhouse kitchen on a budget, let me share some tips with you.
Tips For Creating A Farmhouse Kitchen Design On A Budget
- Paint- this is one of the cheapest and easiest ways to transform the look of your kitchen. White is a perfect color if you looking for a Shabby Farmhouse look. I used chalk paint because I didn’t want to go through the process of using a primer. And in the end it was a much cheaper way to do it as well.
- Nothing says farmhouse like open cabinets, take a few cabinet doors off, and show off your pretty dishes that you use everyday. I don’t have fancy dishes, but I do use my white stoneware and as much as I love using it, I love displaying it too. I actually have more dishes and china in my cabinets now because I took the doors off.
- Take the doors off your sink cabinets and add a skirt. This can be easily done even if you don’t sew. Look for cute feed sack fabric or towels and drape them over a rod, or hand stitch a seam so you can hang them from a stretch rod.
- If you don’t have hardware for your cabinets because of the cost, look at the thrift store. Even if they are the wrong color, or shiny brass, you can paint these. You’ll find these for 98% cheaper than if you purchase these brand new. And even with the cost of repainting them, they are still much cheaper to purchase at a thrift store than brand new.
- Chandeliers in a kitchen, a must have in my book. And you can find these at a thrifty price. You may even score a vintage chandelier at a garage sale, thrift store or even Craigslist. Keep searching and don’t give up. It pays to be patient. If money is an issue still, think about selling a few things you no longer want to make extra money that you can use to purchase your chandeliers. As I said I am frugal, and I have done this myself. I have sold many pieces so I can afford to purchase new pieces for my home.
- Add appliques to your cabinets. Especially if they are flat cabinets with no details. It’s a cheap way to update your cabinets besides adding paint. Just go easy, a little goes a long way.
- Think about adding a chalkboard wall. It really is a fun way to add an accent wall, and it can be changed just by adding frames, old cutting boards, or different sayings added to the wall.
- Add architectural pieces, or fun accents like old pitchers, or paintings. I don’t like too much in my kitchen. But it’s fun to have a few farmhouse accent’s in a kitchen. Like old breadboards, white ironstone. Think of things you enjoy and would like to display. But keep it simple.
- Use what you can and repurpose pieces you may already have. Shop your house for pieces you may be using in another room.
- Don’t expect your kitchen to look how you want it to look overnight. This process has taken me over three years , and I am still making changes. I am not rich, and I am on a very tigh budget. I can’t go out and get whatever I want. But my kitchen looks rich and shows that even on the tightest of budgets you too can create a beautiful Shabby Farmhouse kitchen.
I have a few more changes coming soon. But I hope this inspires you to get creative with your kitchen. And remember, a kitchen design doesn’t have to be large to make these simple changes. Don’t expect it to happen overnight. Start out with paint, that’s the fastest, easiest and cheapest ways to make the biggest impact in a room. I would love to hear your comments and questions.

I love your kitchen and didn’t realize how much you had changed it. You have done quite a lot and it is lovely now what are you doing,can’t wait to see!!! lol
Thank you Marlene! Yes, I have made many, many changes in the past three years. But most importantly I’ve done it all on a very tight budget.
I love all the work you have done. It’s a great transformation…. Well done and thank-you for sharing
Thanks so much Ellie!
Your posts always brighten my day. I’m living in a Manufactured Home right now, so the quality of my cabinets are lets say nil. I’ve actually added in some old cabinets from my brother’s remodel to give me more storage. The floors and subfloors all need to be pulled up and replaced due to a previous leak under the dishwasher. It will be a major remodel, so I’m still hatching my plans. I love the look of your kitchen. I do enjoy some shabby chic, but my style tends to go towards British Colonial, think Jamaica Or the Bahamas. I love my dark mahogany, but I have been lightening it all up with a country toile. Braemore’s Garden Toile. I am using the Aqua Colorway in the dining area, and the Rose in my bedroom. I still think that a French country farmhouse kitchen can fit in. Especially since we live on a Thirteen Acre farm. I can’t believe that you don’t have a sewing machine. I have an entire building on my property just for my sewing! If you lived near me, I hook you up with a machine in a NY minute. Keep posting these delightful tips and DIYs, I sure I am not the only one out there, that smiles when they see yours posts.
Oh you are so sweet Josephine, your comment just made my day :-). Your home sounds beautiful, I love your ideas! And if it takes awhile to get things the way you want them that’s okay. In the end you will be happy with the space you created. Oh girl I need a sewing machine for real LOL! It’s still on my wish list. But this year has been a huge bummer for repairs in our home and car, so that sewing machine will have to take a back seat for now.
Wow! I have been wanting to paint my kitchen cabinets and you have inspired me to go ahead and tackle them myself! I absolutely love your kitchen!!
Thank you so much Nikki!
So pretty! I love your kitchen transformation. I wish I could talk my dh into painting the cabinets
white.
Thanks so much Joy! My husband was not on board at first. But he agreed, and was very pleased with the results.
Such a light and bright beauty! Could you tell me the color and brand of blue paint used on the island? Thanks!
You did such an amazing job on your remodel! We’ve been considering it but our budget is pretty small but this gave me hope that we might be able to do it anyway. Thanks for sharing, I’m definitely stealing some of these ideas.
I love what you have done with the kitchen. You are very talented with budget in mind. I love your posts. Thanks for sharing.