Pantry Doors Update
Pantry doors update is so easy that I bet you’ll be searching for one of these metal pantry’s next time you’re out treasure hunting.
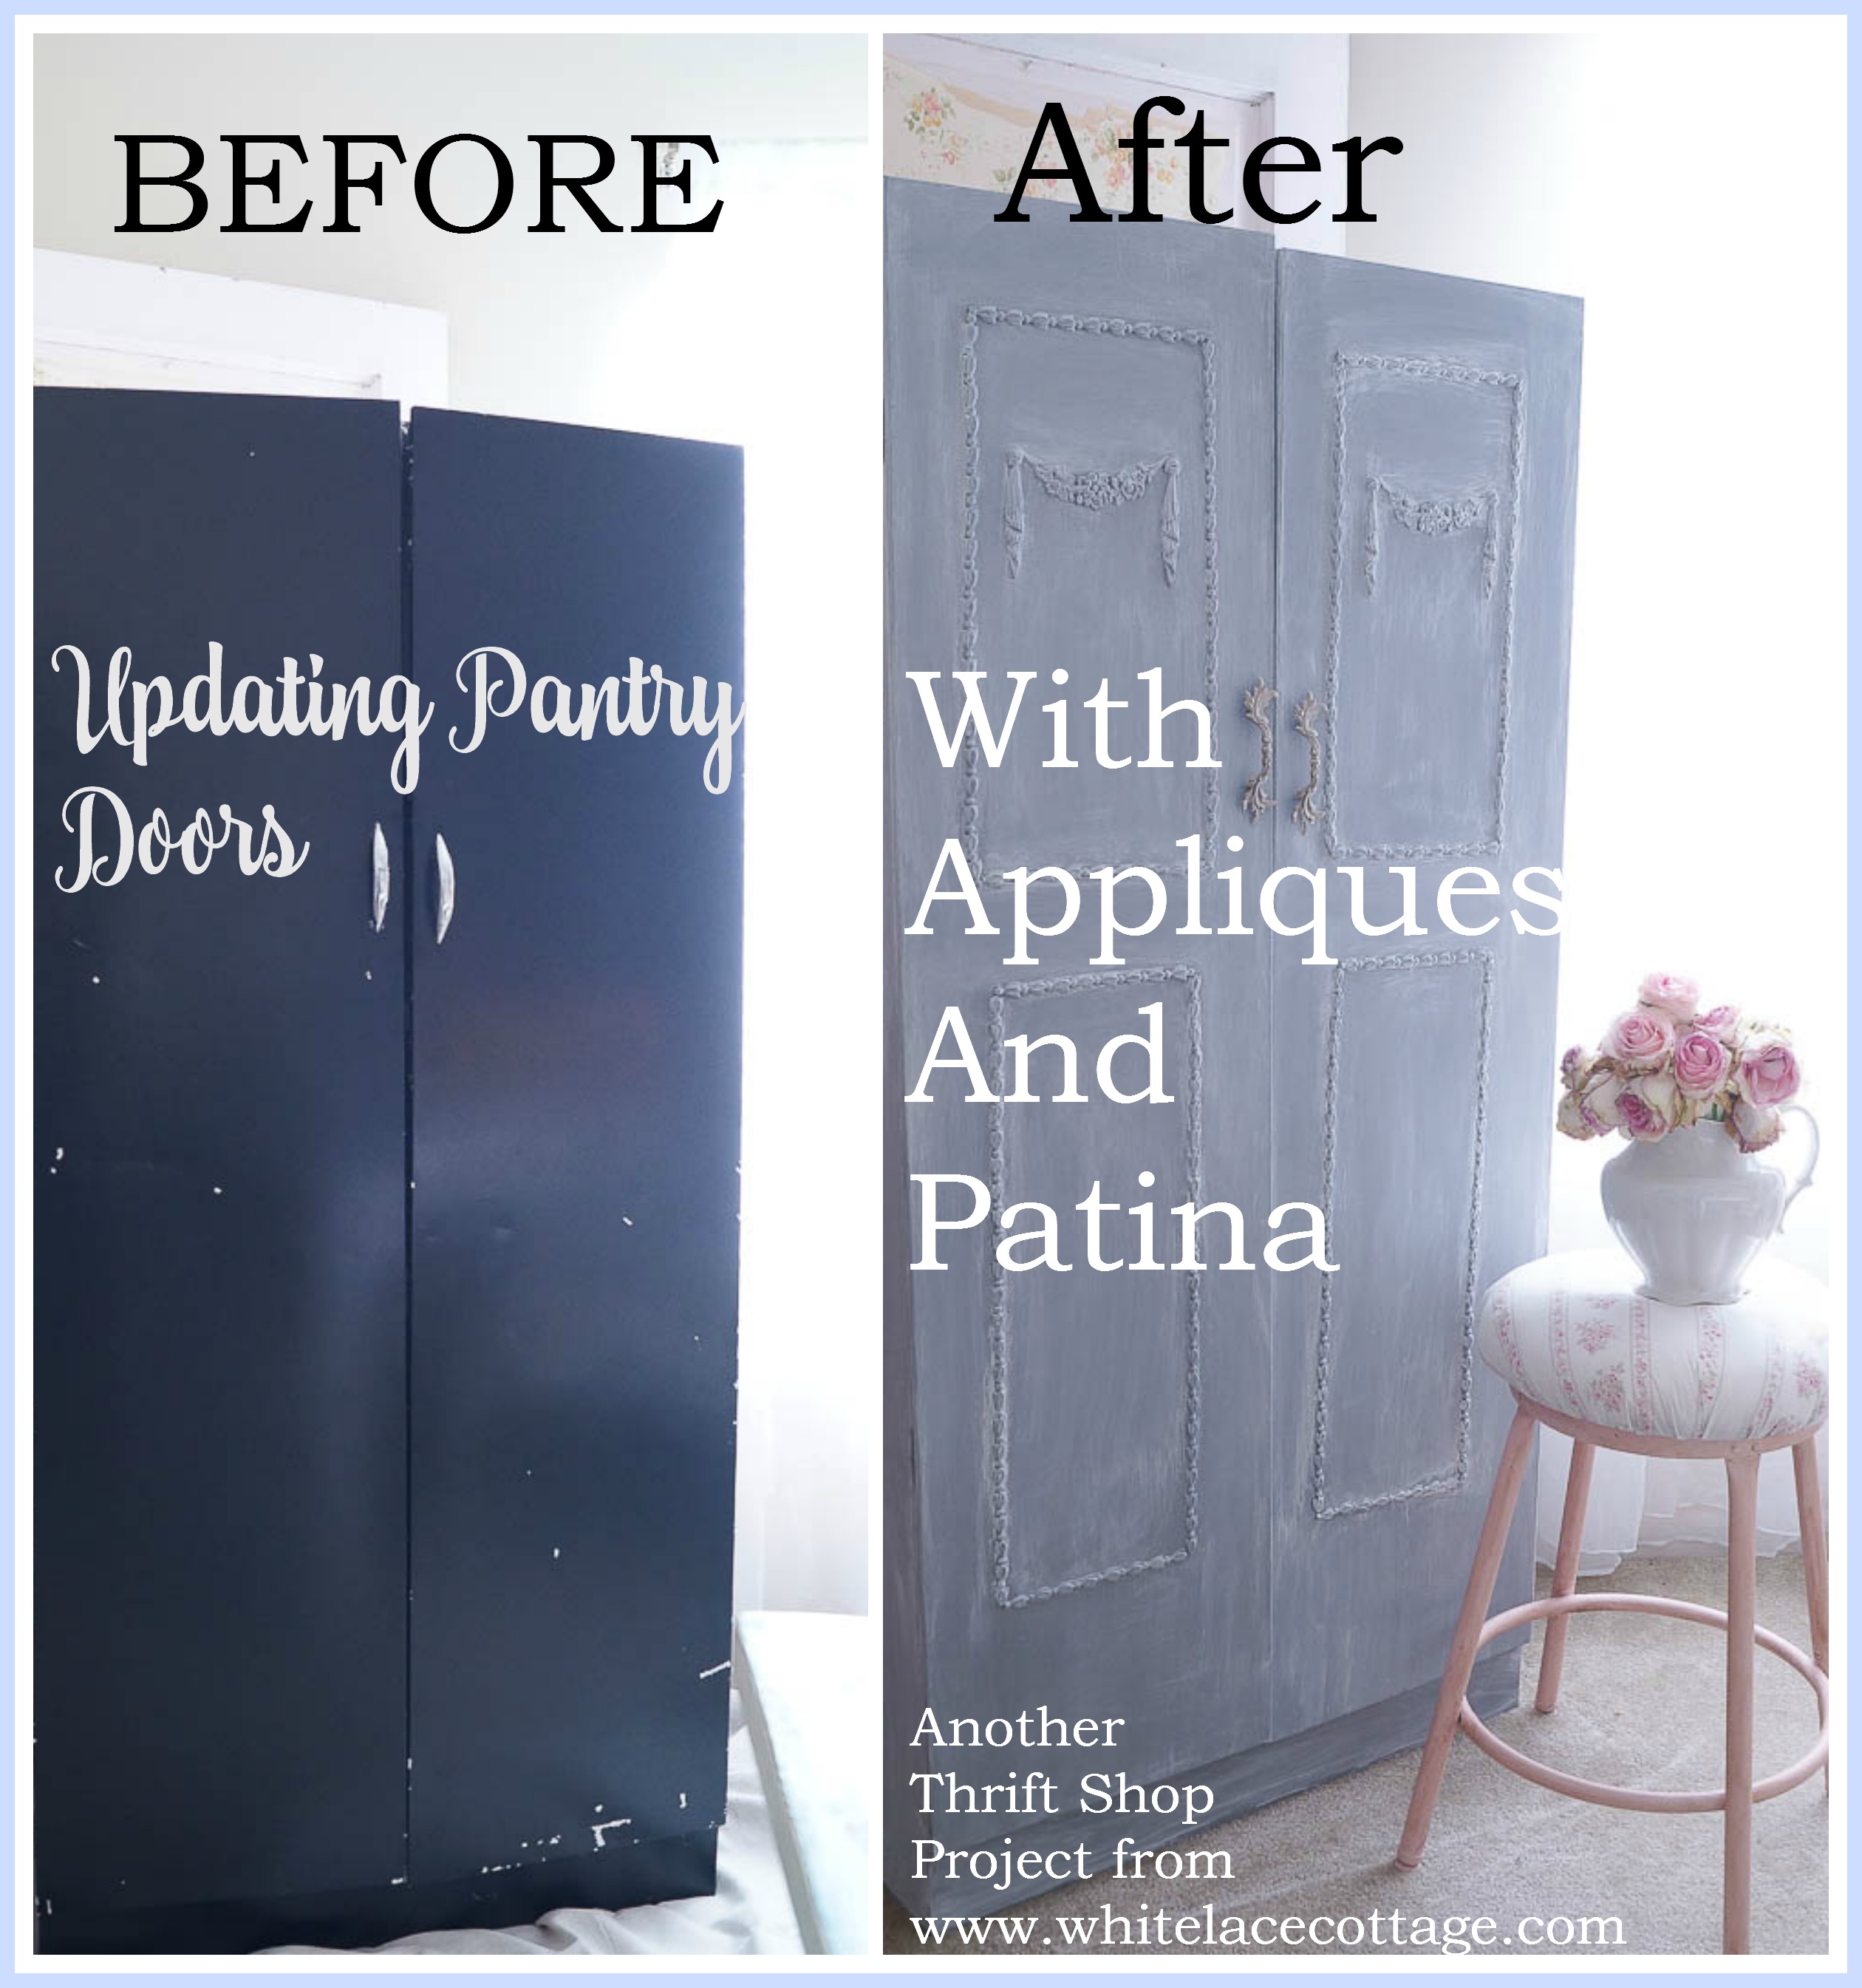
Well, look at the before photo of these metal pantry doors, once you scroll down you won’t believe that this is metal. I found this old metal cabinet many years ago, before I started blogging. And yes as ugly as it was, this is how this looked when it was in my laundry room.
I think people used these in a kitchen many years ago for extra storage, probably before built-in pantry’s became popular.
(This post contains affiliate links, please read disclosure policy)
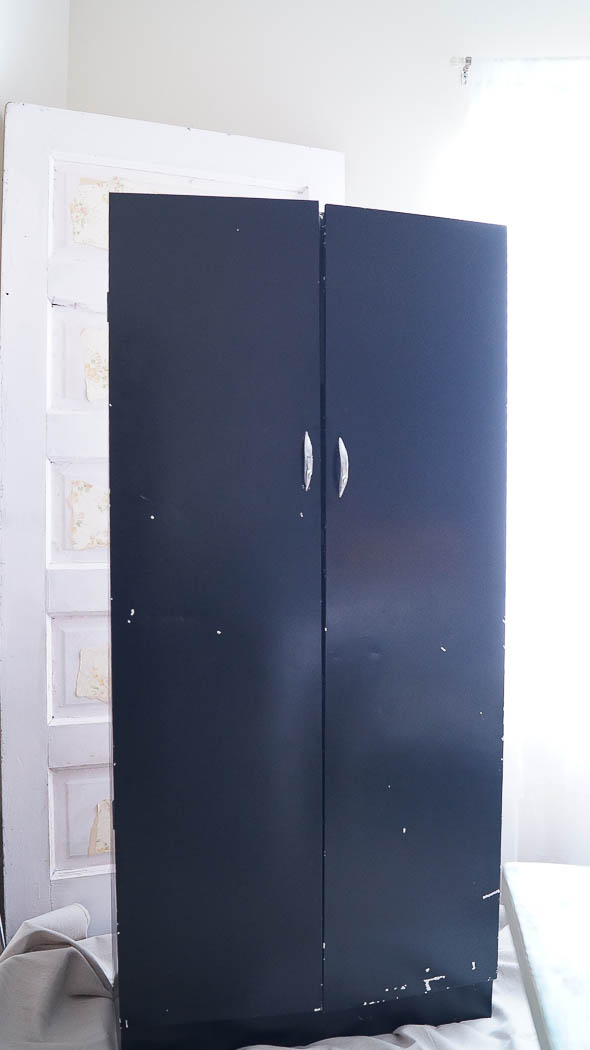
When I purchased it originally I spray painted it black, that’s when I was really into the color black, shocking isn’t it! For the past 7 years, this has been in my basement, storing old cans of paint, to which I need to get rid of , but that’s a whole other story.
I could have repainted these pantry doors, adding a stencil and that would have updated it. But I decided that the pantry doors needed more than a fresh coat of paint, and a stencil. The pantry doors needed details as well, oh and new hardware too!
I started out mixing three colors, Thunderous, Nickel, and Twilight, all are from Heirloom Traditions Paint.
Why three colors?
Well, I was getting low in my paint, and I had just enough of these three colors to paint this piece. I really wanted to give this piece a French look. I know you’re thinking, but paint isn’t enough to give these pantry doors a French look, well, you’re right.
Here’s where the details come in for this project.
Do you remember when I added appliques to my kitchen cabinets, and my media center? Well, I had left over appliques from my projects and decided to use the appliques on these cabinet doors.
First I needed to figure out where I would add the appliques, I had an idea in mind, so I started placing the appliques on my cabinet doors, then taping the appliques on each pantry door using scotch tape.
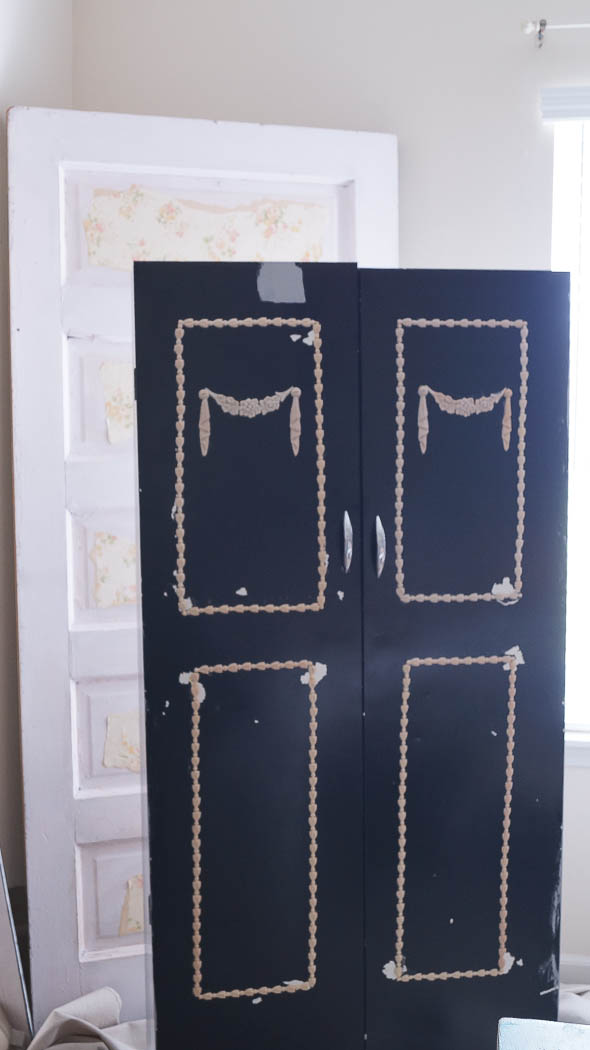
Once the appliques were taped on each door, I stood back and looked at it. They looked a little off, so I messed with them again to make sure exactly where I wanted them to go. I didn’t measure either, I just eyeballed it. These pantry doors are uneven, so measuring wouldn’t have made each side even.
Here’s a little tip
If you are using a pattern as I was, to make sure both sides are even you can count the pattern to determine the measurement. And always make sure you’re pattern is going in same direction.
Then, I removed a applique section at a time, and applied Contact Cement to each applique, and then placed the applique on my pantry door. While these appliques were drying on my pantry doors, I started painting the rest of my cabinet.
Once the appliques on the pantry doors were dry, I started painting them. I used two coats of paint on this entire piece, I didn’t paint the inside, I’ll get to that in a bit.
After the paint was completely dry, the pantry doors were sort of blah…
It needed a little patina, but I couldn’t distress it because you would see the paint and metal underneath and I didn’t want to see any of that. So, I added a patina using A La Mode from Heirloom Traditions paint.
I’m not going to get into detail as to how I applied this patina, because I’m finishing up a book and I’ll also have a video tutorial sharing how to do this. Here’s a side by side comparison of the two pantry doors.
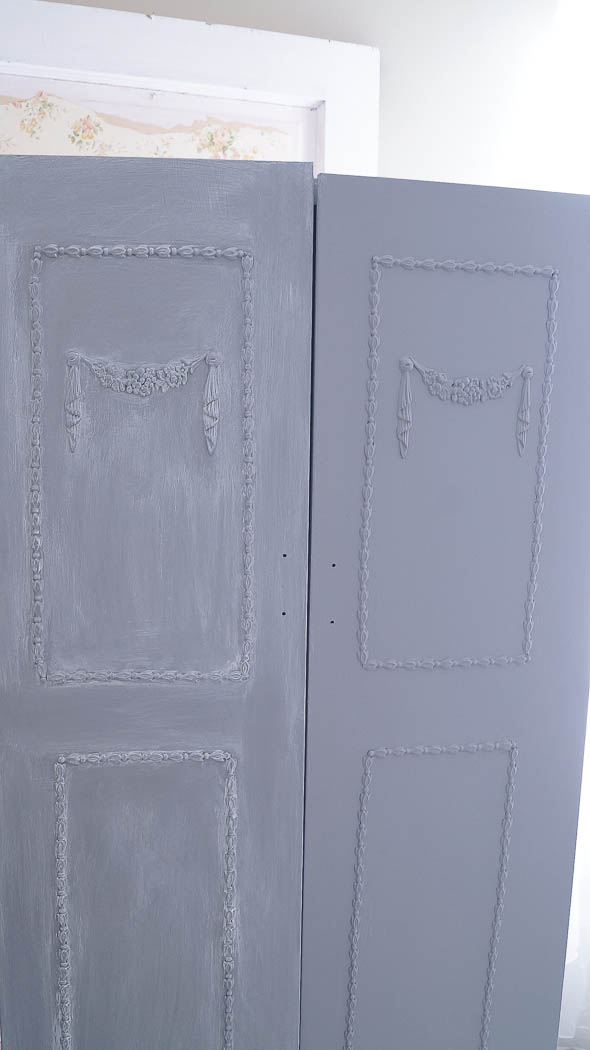
The pantry door on the left really shows the detail, and looks like wood, the right side is sort of boring even though the appliques added detail, it’s not enough.
I continued applying this patina to my entire piece, then I added new hardware to the pantry doors. It was a a bit tricky adding the hardware because they were a little too big. But, I was able to bend them slightly so they would fit into the holes that were already drilled in the pantry doors. I didn’t paint the inside of this cabinet, but instead I added painters tarp fabric to the shelves.
Why fabric?
Because I was trying to use everything I already had to update this piece.
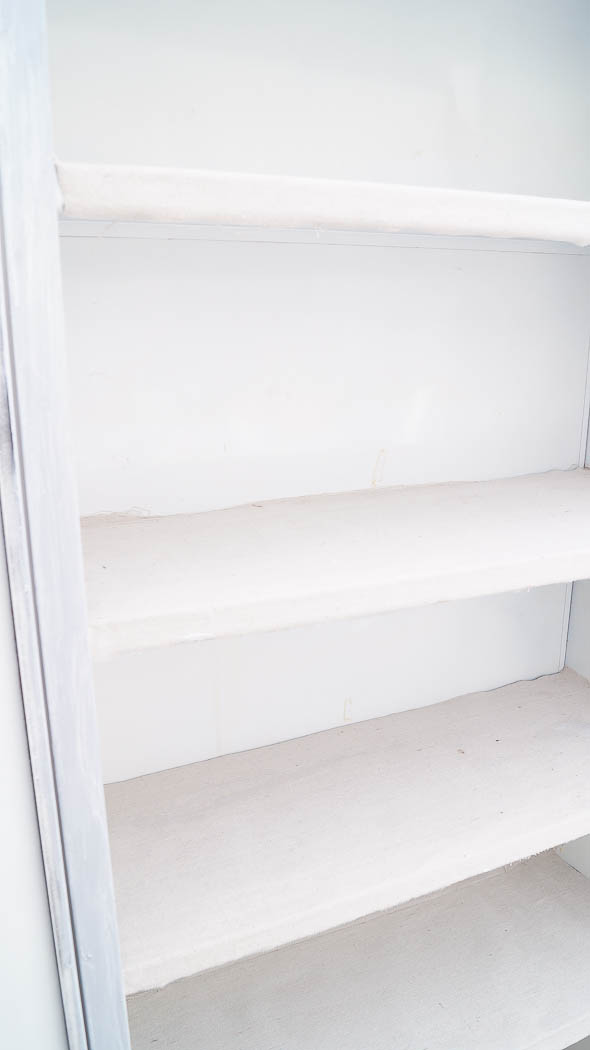
I measured each shelf, cut the fabric and used tacky glue to apply it to each shelf. After the paint was dry I added a coat of clear wax to seal this piece. I could have used a top coat such as aqua clear, but I really felt that I needed wax on this piece to really make it look like wood.
And here’s my finished pantry.
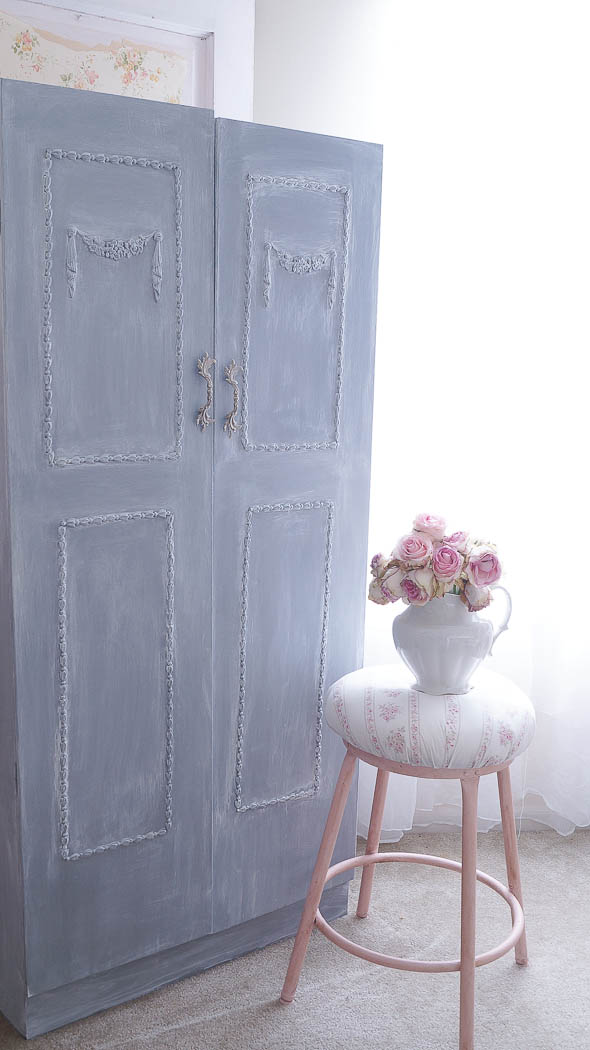
As I said the pantry doors are slightly off, one is larger than the other, but it just adds character in my opinion. I’m going to have a really hard time parting with this at my sale.
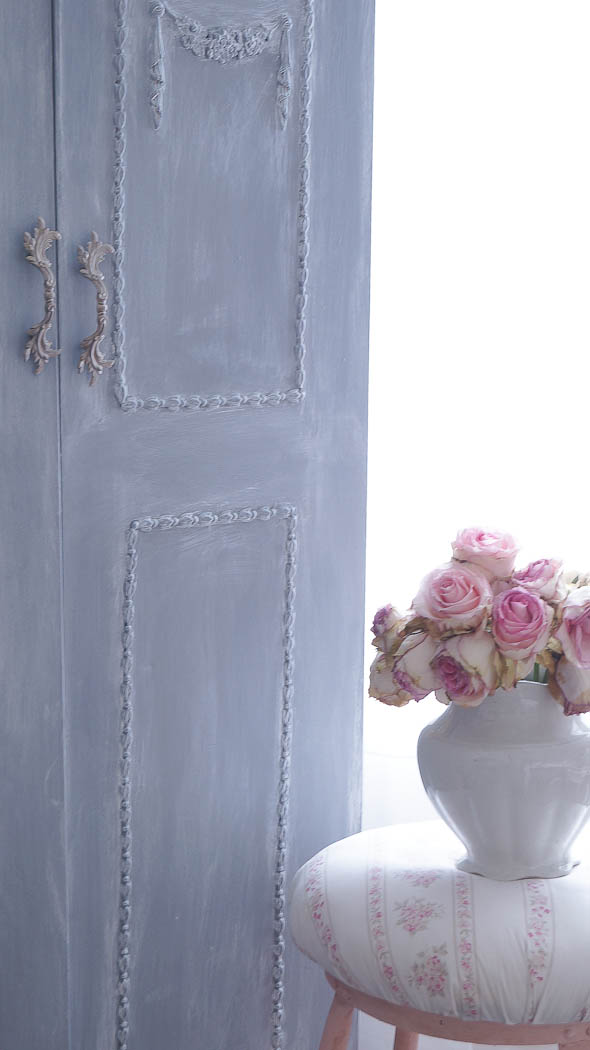
I think this would look amazing in a bathroom for towels, a kitchen for storage, a laundry room for storage, or a craft room.
I bet you’re shocked at the color, as I don’t do much grey. But this piece really needed a French color, and grey is it!
Doesn’t this look like wood?
I can’t believe the transformation and it was so simple to do! I spend zero money on this piece because I had all that I needed.
You can watch the video tutorial on this piece below.
So what do you think? I hope I’ve inspired you, don’t pass up a piece like this just because it’s ugly and boring.
Just think of the possibilities!
Supplies used for this project:
Heirloom Traditions paints
EFex appliques

What a beautiful piece…..I will never look at a metal cabinet in the same way! I will go looking for one and try your technique!! Thanks for the inspiration~
Within last 30 minutes I removed a white metal cabinet from wall of storage shed at the beach. I drug it to the curb for trash pick up… Here I go to curb to drag it back. Wow.. You have inspired me!!
I love what you did with this cabinet! Very creative and looks great
I have a cabinet just like that on the side of my garage and its yellow and soooo ugly! Wanted to get rid of it but maybe there’s hope for it yet! Thanks for sharing, the transformation is amazing!
Nice transformation! Really nice!
Love it Anne! I wasn’t expecting grey – thought maybe pink? You did a great job- the appliqué makes it look wider somehow.
I love it!
Simply? I love it!!!!
Oh I love that! You are so incredibly talented!
Wow. The transformation is astounding! I love it. And yes, I want to go find me an old metal cabinet now…
🙂
http://gwingal.blogspot.com/2016/04/from-ugly-metal-utility-shed.html
Oh how beautiful this turned out. I love it.
Anne! There is no way I would have believed this gorgeous cabinet started its life as an ugkly metal utility cabinet! No way! You have made it so French, so beautiful! The mix of colors created such a great dimensional color. If you had to give the paint color you ended up with a name, what would it be? The patina is right on and adds the perfect aged appearance. You, girlfriend…is there anything you cannot make beautiful?? I don’t know how you’re going to be able to put this piece in your sale!
Love this Anne….So Pretty!